Showing posts with label DIY. Show all posts

Monday, June 2, 2014

Shady Business

We bought this (Jugend styled?) lamp a couple of years ago from a Fall Market in Tartu. It was put in storage after that since we really didn't have a place to hang it in our apartment back then. But now we have moved and we had a perfect place for it over our dining table. It only had one problem...no shade what so ever. At first we thought that maybe we could make it work without the shade, but the light was too harsh and very...in our face ;P


So I searched through my fabrics, found something that i liked and got to work. I tried out a couple of different ways to drape the fabric and decided that the best way was to sew a rectangular piece of fabric to the top rim of the lamp and then gather the fabric at the bottom.


It took some time to sew the fabric to the top since I did it by hand and standing on a chair (since we couldn't be bothered to take the lamp down ;P...which probably would have been easier to do than sew everything while the lamp was hanging..well ..live and learn :D).


I really like the end result (as usually with the projects I show here...the ones I don't like so much don't usually get much broadcast ;P). There is enough light coming through the fabric and the light gets defused nicely around the room.

Ciao-ciao,

Sunday, January 12, 2014

Easy DIY Ruffle Pillow

Christmas came and left and so did New Years Eve... I can't believe it's the year I turn 25 already ;P
We are also kind of in the middle of moving right now so the last few weeks have been quite an exciting and busy time for me and my little family :) Luckily i have had this post waiting or some time so I can publish it now :))
Do you remember the post about the duvet cover I made? Well anyways I had some leftover ruffles and of course I couldn't just dismiss them and throw them away. So I decided to make a little ruffle pillow. And I even took pictures of the process (for once!) ;D so I can share it with you and try my best to explain all the steps.

First cut out the pieces, for my pillowcase I cut out a square that was 40cm x 40cm and two pieces that were 40cm x 30cm. I used these measurements just because I already had a pillow and those were the measurements that I thought would suit best. You can always alter the measurements according to your needs.


Turn back the edge twice on each of the smaller pieces of fabric, so you will have a "clean" edge. This will be the opening for inserting the pillow. Pin first and then stitch to place.


Then take your ruffles (if you don't have leftover ruffles like I did, you can always make some and then come back to this step) and arrange them on the larger piece of fabric (40cm x 40cm) in a way that pleases you. I just arranged them in (relatively :P) straight rows and pinned them down.


After pinning go in with your sewing machine and stitch them in place (instead of a sewing machine you could do this whole project by hand, it will just take you more time to finish but it is absolutely doable if you don't own a sewing machine or are not familiar with using one).


After sewing on the ruffles it's time to assemble the pillowcase. Lay the larger piece down so that the ruffles are facing up (right side up). Then lay one of the smaller pieces so that the "raw" edges are lining with the larger pieces edges on one side and the other smaller piece so that the edges are lining on the other side (as seen in the picture below). Both of these pieces have to be laid down so that the wrong side is facing up.


Pin the pieces to place and then sew all of the sides together.


Now the last step would be cutting off the corners as shown on the picture below. This step is not necessary but it makes it easier to push out the corners after you have turned the pillow case right side out. After you have turned the pillow case right side out, insert your pillow and...


Voilá! You have yourself a cute ruffly pillow :))


If you're not yet a follower then feel free to click the follow this blog button or go and like my Facebook page, it would literally make me jump for joy!

I hope you have an amazing day, at least I'm loving it because we finally got snow yesterday!
Ciao-ciao!

Monday, December 16, 2013

Pine Cones Dipped in Glitter


My niece-in-law and I went to gather some  pine cones a while ago and some days ago I decided to glam up the pine cones with some glitter to make them a bit more festive.

For some of the cones I used some leftovers of a gold and a silver glitter. I just brushed on some glue and then sprinkled on the glitter.


But as I said those two (very very pretty glitters) were only leftovers from some previous projects so for the rest I just used some golden glitter glue I had and although the glue isn't as sparkly as the leftovers I had, it did the job well enough.
It took a while (approx 1,5 hours) to coat all of the pine cones with the glitter and I also let them dry over night just to be sure the glue has dried properly.


You can use these pine cones to make a garland, or decorate your candle holders or just arrange them in a vase or glass jar and put those on the windowsill.


It looks really pretty and oooh I love the sparkle, especially in candle light. It's a pity that the pictures don't do the glitter justice, it really does sparkle a lot and looks so-soooo beautiful :))


Hopefully I will get at least one more post up before it's Christmas. I can't believe it's just over a week until it's Christmas Eve, I'm so excited!

Ciao-ciao!

PS! Be aware of fire safety if you are using pine cones as decorations around candles. They are very flammable.

Friday, December 13, 2013

Glass Jars and Sparkly Glitter

I wanted to make some candle holders with numbers on them for each of the Advents.
And the easiest way I could think of was to take some random glass jars I had in my collection (yes, I do have a collection of empty jars ;D), some basic paper glue and glitter (I chose red just because I love the colour and I thought it would stand out the most).


I used a small brush to make the shape of the numbers with the glue and a fluffy brush to dip it in the glitter and then tap the brush so the glitter would fall on the glue.

I've tried pouring it straight from the little glitter container before and i don't know if it's just me but it made a huuuge mess. It was a little messy even using the brush but not as much as pouring from the container.


When the glitter had completely dried I brushed off the excess with the fluffy brush, then added some candles and... Ta-Daa! Very easy and quick (it probably took me under 30 minutes to make these).


PS. I took most of the pictures already over a week ago ( that's why there's only one candle burning on most of the pictures) but the picture taken in the evening looked best with all the candles burning :))

I hope you're enjoying December, I know I sure am :))
Ciao-ciao!

Tuesday, December 3, 2013

Pearl Wreath for Christmas

I can't even express how excited and happy I am that it is December already and the Holiday season is on!!
Christmas is definitely my favorite Holiday of the year, I just LOVE it!
I love the weather (especially when it's snowy), I love glögg and ginger breads, I love the festive atmosphere and all the decorations and of course I love spending time with family...do I have to say more? ;D
Every year I try to make some decorations for our home and this year has been the same. I will try to write about as many Christmassy projects as I can and I hope you will enjoy all of them :))
 
I actually made this pearl wreath last year already.
I just used a styrofoam base that I got from a local crafts store, A LOT of different coloured and sized plastic pearls, a hot glue gun and some ribbon.


I basically just glued the pearls on the styrofoam base with my glue gun, arranging the pearls in a way that pleased me. It took much longer than I had anticipated, but it was well forth it. I really like how it came out. It's really festive and that is exactly what I like ;D

I decided to hang it in front of a mirror as I like the effect it gives.


You can see Tindra climbing on some boxes on the background, I actually didn't notice her featuring in the pictures until I looked at the photos on my computer ;P

I'll be back with other Christmassy projects soon, until then I hope you're enjoying the Holiday fuss as much as I am.

Sunday, October 13, 2013

Do a Redo: Women's shirt into a dress for children

It's been a loooong time since  last posted anything but I want to get back on track again :))
And what would be more suitable than a very summery post about a very summery dress...ok i can think of many more suitable things to post about now that it's getting colder and we're nearing Halloween etc, but the truth is that i was supposed to post about this dress before the summer started and then...the summer started and I forgot...
So I'm posting it now and if not for anything else then at least as a reminder that the summer will return in about ...9 months ;D

But anyways let's get to the business...
So my sister in law gave me a bunch of really airy and light white blouses and at the time I was planning on wearing them during the summer...and then I cut them to pieces and made children's dresses :D


I used a pattern from a craft magazine I had in my stash. This differs from the post I made about re-purposing a men's shirt into a girl's dress in a couple of ways. Firstly the bodice and the skirt are two separate pieces. I wanted to maintain the interesting look the fabric had originally so I cut the front piece of the bodice out of that and then I wanted the skirt part to be quite gathered and flowing so I pleated the skirt to the bodice.


I left the sleeves loose instead of shirring them like I did with the other dress.It came out pretty much exactly as i wanted it and I will definitely make her a couple of these for next summer, too :))


Hope you have a beautiful autumn day!!
Ciao-ciao!

PS. Looking at these pictures I realized HOW MUCH Tindra has actually grown during the summer :))

Friday, May 17, 2013

Two Sided Duvet Cover

I have long wanted to make a Duvet Cover for our bed and when I was searching for inspiration for making one I found two which I loved.
The first one was quite minimalistic and modern and the other one was very romantic and quite girly.
Both of the posts have instructions for making the duvet covers, so if you'd like to make one the instructions are there.
I wasn't able to decide which one I'd like to make and so I combined the two and made a two sided duvet cover. I didn't follow the instructions too strictly but I got my basic guidelines from them and then I just made some modifications to suit what I wanted to make.

For the minimalistic side I bought a bunch of linen in different shades of grey and also white. I cut it all up and organized the pieces according to the directions. After this it was all sew, sew, sew.


Seems relatively easy but it took me a looooooong time to do all of that. It was partially because of the pattern and partially because I just got tired of doing the same thing all over again and again and I'm not even talking about the times I messed something up and had to take it apart and start again. But I pushed through and got it done :)).


For the romantic side I bought a 220cm x 220 cm bed sheet to use as a "base" and for the ruffles I used some old cutup cotton sheet I had lying around. I started by cutting the base piece to fit the minimalistic side I had already finished (so about 200cm x 180cm). Then I cut out long strips of fabric in different widths. After this I hemmed all the long sides of the strips with the zig-zag stitch on my machine because I don't want the pieces fraying too much. And then I started ruffling the strips. I made the ruffles just by gathering the fabric while sewing at the same time, I found this to be the most efficient and fastest way to do it. I also made the ruffles in different widths to add some more dimension and versatility.

So I ruffled and ruffled and ruffled away until I felt that I have enough.(I ended up making some more ruffles after I had pinned the existing ruffles on the "base" because I felt that it needed at least 3 more rows of them) This was actually the funnest part of this project, to see the pile of ruffles grow bigger and bigger.

Then I placed the ruffles on the base piece and pinned them to place. After this I stitched all the ruffles in place with my machine. Some of the ruffles needed two rows of stitches to hold them in place the way I liked it.


After this I also made a long continuous ruffle by stitching 6 2m long (13cm wide) strips of fabric together. i did this to make the ruffle edge to the duvet cover because I felt that it needed some kind of trim or edge to finish the look I was going for. So I placed the minimalistic side right side up, then I placed the ruffled trim around the edges so that the edge of the trim that I wanted showing was towards the center of the cover and the other edge was even with the edge of the cover. And then I placed the ruffled side on top with the wrong side up. Ok, I know this all sounds very confusing, but I tried to do a little illustration to make things (maybe?) a bit more clear :P Please keep in mind that I really can't draw at all ;D The yellow parts indicate the ruffles.

Then pinned everything to place and sewed along the edges leaving approximately  a 30cm opening to the upper edge (where I didn't place the ruffled trim) to turn the whole thing right side out. then I just stitched the opening and ...

TA-DAA!!
 I absolutely LOVE how it turned out. I've never been so happy to finish a project :)) It gives our bedroom a very idyllic and kind of a fresh feeling. Anyways I love it!

Oh, and did I say already that I love it ;))
 

I hope you enjoyed and have great weekend!
Ciao-ciao!

Friday, May 10, 2013

A Summer Bonnet

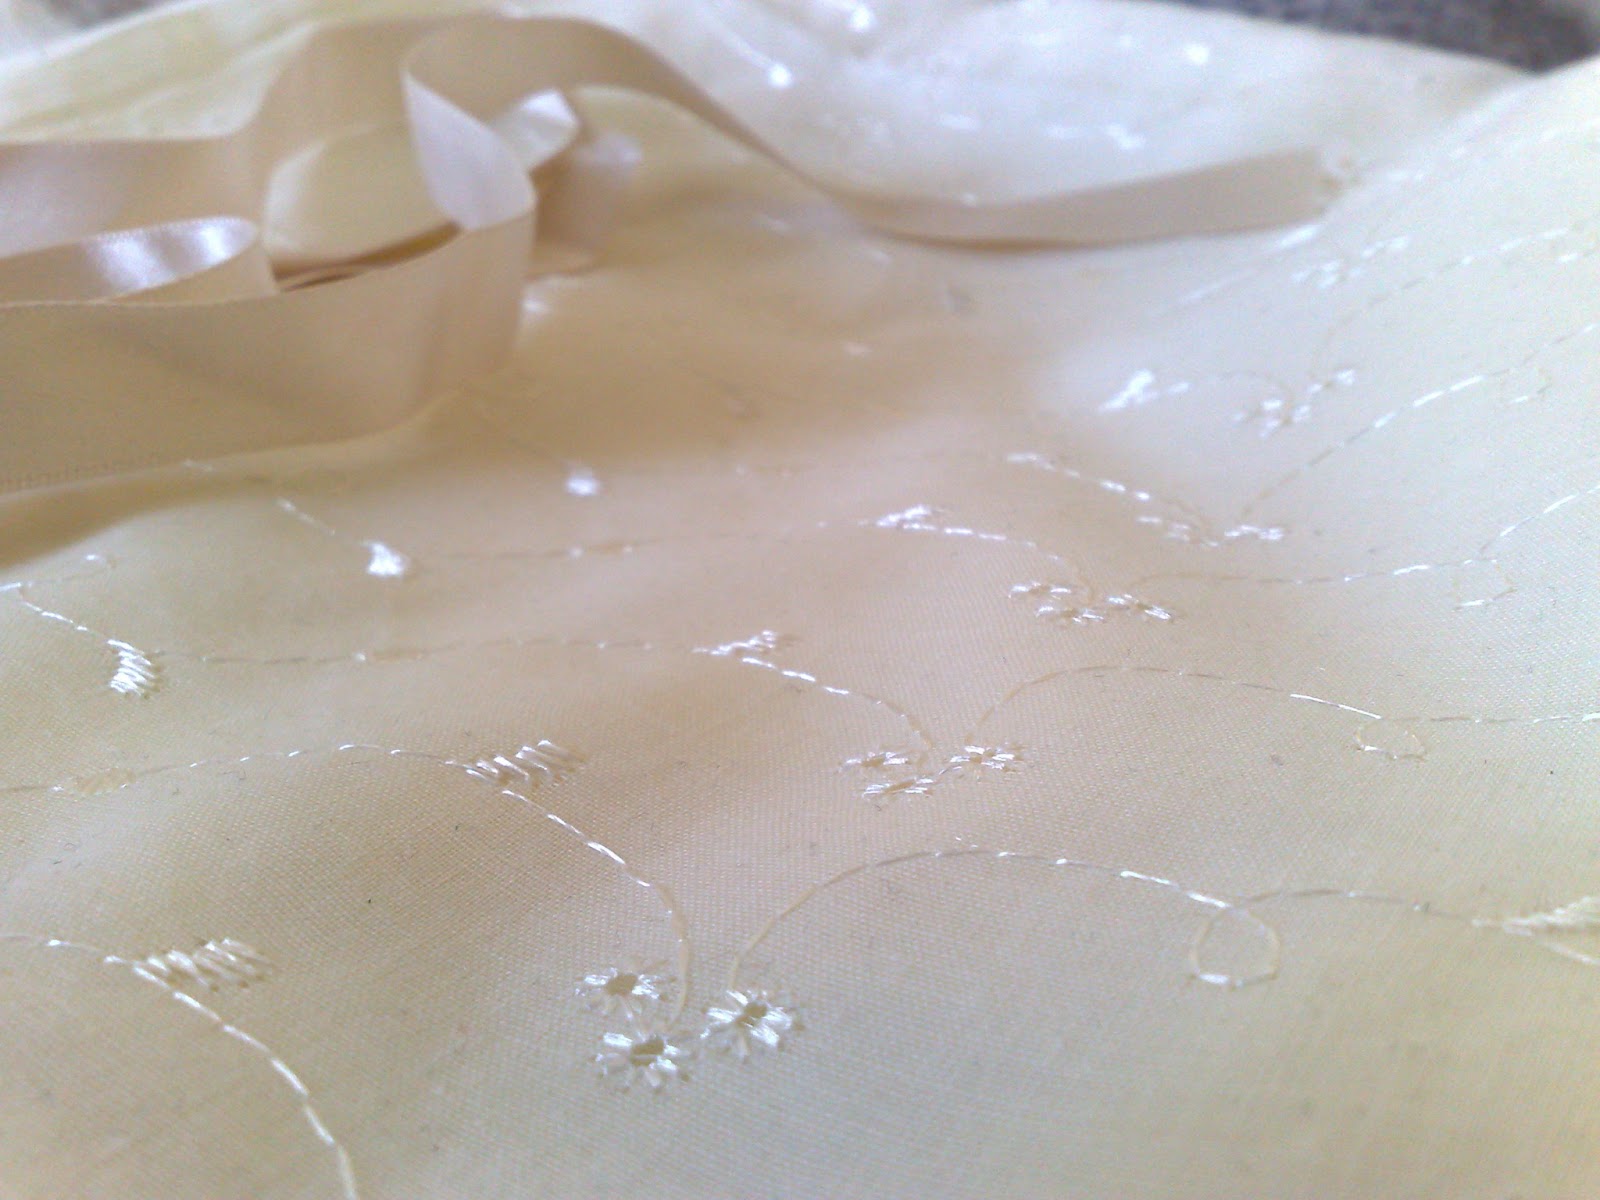
I found this tutorial for making a bonnet and I knew right away that I want to make one for my daughter Tindra. And because we've had quite warm weather here in Estonia I thought it would be quite appropriate to also write about it.

I had bought this fabric from our local fabric store a while ago just because I liked it a lot and thought it was pretty. And when I found teh tutorial mentioned above I knew I would use this fabric for making it. (I only used a small part of the fabric so I still can make a dress or something else for the summer ;D )

I love the embroidery on the fabric.

There are much better instructions in the blog I referred to before but I will briefly take you through the process, too. Firstly cut out the pieces for the bonnet. The bigger crown piece is 18cm x 36cm, long side on fold. And the two smaller brim pieces are 9cm x 23cm, short side on fold. Also cut out two pieces of interfacing for both of the brim pieces. (Lets see how many times I'm able to write the word "piece" in this post ;D ;P).

After this iron the interfacing pieces on the brim pieces. Note that you will iron it on the wrong side of the fabric. I accidentally ironed it on the right side on one of the pieces, fortunately my fabric looks almost the same on both sides so it's not very noticeable.

Then sew the two brim pieces together with the right sides facing each other and leaving the long straight side open.Turn the brim right side out, cut the corners.

Fold the edge inside and press so it will be easier to attach the gathered crown piece between the brim.

Hem the crown pieces neckline (the straight shorter side of the crown piece). 


I forgot to take pictures of the last steps of making the bonnet, sorry.
Stitch the crown pieces unhemmed sides (from the neckline on one side around the curve to the neckline on the other side), pull the yarn so that it gathers the fabric. The gathered fabric should match with the pressed side of the brim. Then put the gathered fabric between the brim, attach it with pins and sew along the brim.

I attached a rubber band to the neckline (from one side of the brim to the other) because the bonnet was very big for my daughter.

Lastly I attached some ribbon so we could tie a nice bow and keep the bonnet from slipping off her head.
I really like the way it turned out, it's super cute and I can't wait for summer so she can wear it all the time :))
Also I think this will fit her at least two summers if not three, because of the gathered fabric and the rubber band at the neckline.She will definitely get a lot of use out of it :))


I secretly want to make one for myself also ;P. Too bad I'm not a cute baby who can pull it off ;P ;D


Hope you enjoyed it! Ciao-ciao!

Thursday, May 2, 2013

Golden Chain Necklace with Minty Accents


I've wanted to make a statement necklace to add some colour and va-va-voom to simple outfits for a while now.

So when I found THIS instruction I got inspired and decided to make something quite similar.

I used a gold chain, some mint green yarn and some green leaf-like beads I got from my cousin years ago.

I thought the colours would be nice for spring and summer


I cut the chain into two pieces and weaved these pieces together with the yarn, leaving the ends quite long. Then I attached the beads with another piece of yarn, again leaving the ends of the yarn quite long.

Lastly I attached some more yarn to both sides of the chain and braided the yarn using THIS instruction.
I think the braid gives the necklace a more finished look.

 I wear a lot of dark clothes so it's nice to brighten up the look with a pop of colour.

Make me extra happy by following my blog :))
Hope you've had a great day!
Ciao-ciao!

Saturday, April 27, 2013

Repurposing a T-shirt into a Necklace

There are many t-shirt re-purposing ideas that I'd like to try out and I decided to start with something fairly simple - making a necklace.

I made the necklace out of a shirt that had some holes in it (and therefore I didn't feel bad for cutting it up) and I also used some mint pearls and chain that I bought recently.

Unfortunately I forgot to take pictures of the process of making the necklace but I will explain briefly what I did.


Firstly I measured how long I wanted the necklace to be.


Then I cut the chain according to that. I cut the jersey material a bit (maybe 10 cm) longer than the chain. 


I braided three of the jersey strips, made knots to one of the strips and left the others as they were.I did this to add some texture and make it a bit more interesting.


I took some thread and weaved it through the chain adding the beads at random distances. I'm not a fan of symmetry so the more asymmetric and random the better ;D
 Then I attached the chains and the jersey strips to a loop, kind of twisting/braiding them randomly so they would make a nice form. The fastener is quite bulky and heavy duty but I think it suits the look I was going for.
 

 Here is how I wore it the other day.


Hope you enjoyed and are having a great day!
I'll go and have a piece of carrot cake in celebration of getting 40 likes on my Facebook page Wohoo ;D
Ciao-ciao!